uGet is a free and open-source download manager for Linux that allows users to easily manage and organize their downloads. It supports parallel connections, resuming of downloads, queueing of downloads, and more. In this blog, we will go through the steps to install and use uGet on Ubuntu Linux.
Step 1: Update System Repositories
Before installing any new software, it is important to update the system repositories. To do this, open the terminal by pressing Ctrl+Alt+T on your keyboard and run the command:
sudo apt update
This command will update the list of available packages from the Ubuntu repositories.
Step 2: Install uGet Download Manager
To install uGet download manager, run the following command in the terminal:
sudo apt install uget
This command will download and install uGet along with any necessary dependencies.
Step 3: Launch uGet Download Manager
Once the installation is complete, you can launch uGet from the Applications menu or by running the command:
uget-gtk
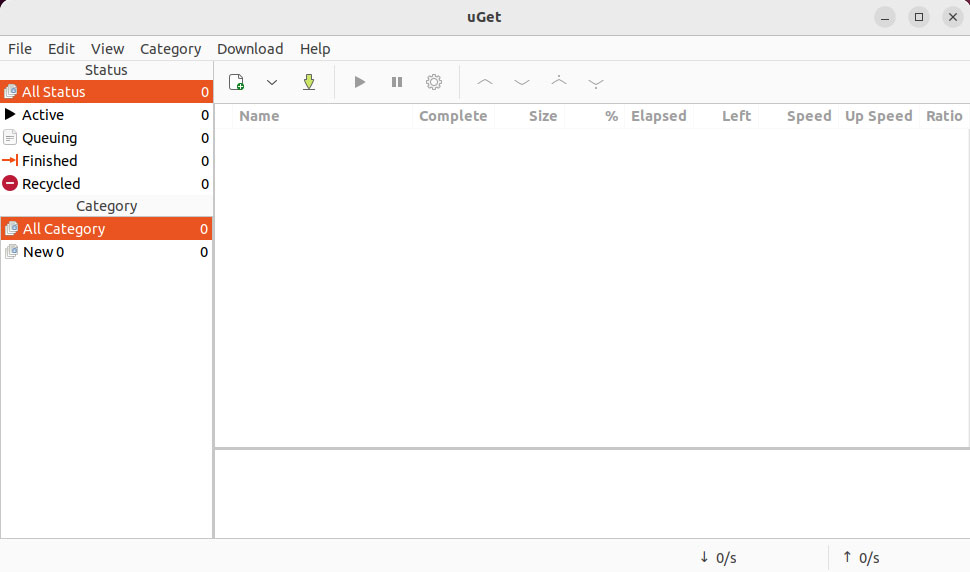
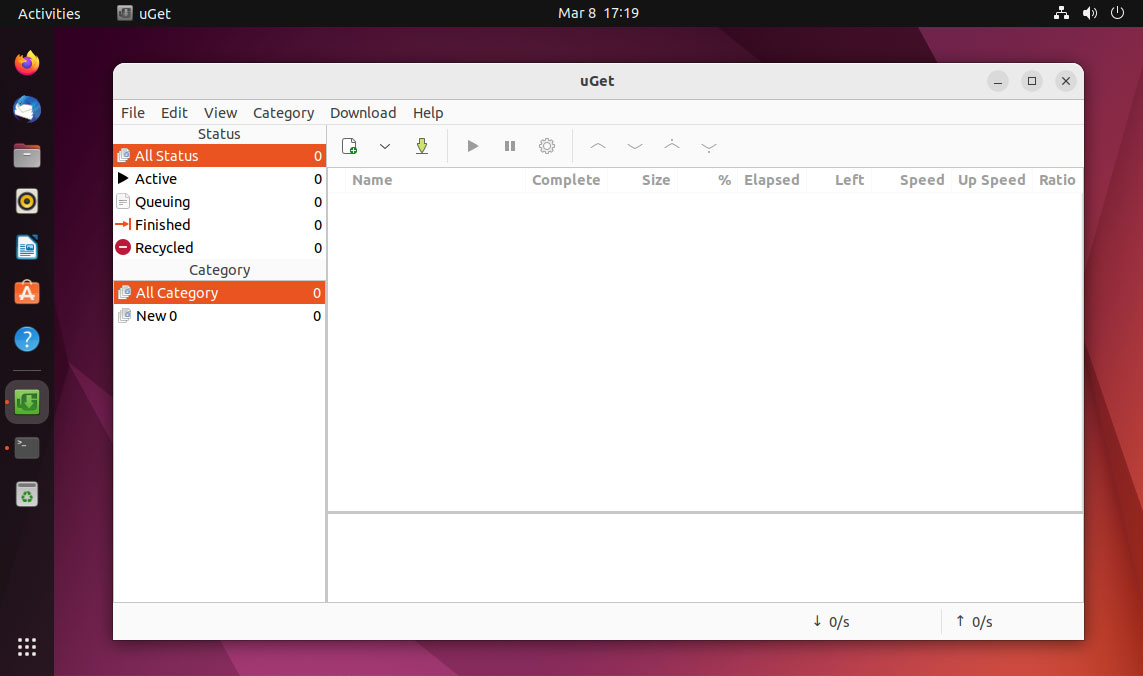
This will open the uGet main window.
Step 4: Configure uGet Download Manager
Before you start downloading files with uGet, it is important to configure the download manager according to your preferences. Here are some of the important settings that you may want to change:
- Download Folder: By default, uGet saves downloaded files in the user’s home directory. However, you can change this by going to the ‘Settings’ menu and selecting ‘Directories’. Here, you can specify the location where you want to save downloaded files.
- Maximum Connections: By default, uGet downloads files with 3 parallel connections. However, you can change this by going to the ‘Settings’ menu and selecting ‘Connection’. Here, you can specify the maximum number of parallel connections you want to use.
- Bandwidth Limit: By default, uGet does not limit the download speed. However, you can set a bandwidth limit by going to the ‘Settings’ menu and selecting ‘Connection’. Here, you can specify the maximum download speed in KB/s.
- Download Scheduler: uGet allows you to schedule downloads to start at a specific time. To use this feature, go to the ‘Settings’ menu and select ‘Scheduler’. Here, you can specify the time and date when you want the download to start.
Step 5: Download Files with uGet Download Manager
Once you have configured uGet according to your preferences, you can start downloading files with it. Here’s how:
- Copy the download link: To download a file with uGet, you need to copy the download link of the file. You can do this by right-clicking on the download link and selecting ‘Copy link address’.
- Add the download link to uGet: Open uGet and click on the ‘New’ button to add a new download. In the dialog box that appears, paste the download link in the ‘URL’ field and click on the ‘OK’ button.
- Start the download: Once you have added the download link, click on the ‘Start’ button to start the download. You can monitor the progress of the download in the uGet main window.
Conclusion
uGet is a powerful download manager for Linux that allows users to easily manage and organize their downloads. In this blog, we have gone through the steps to install and use uGet on Ubuntu Linux. By following these steps, you can configure uGet according to your preferences and start downloading files with ease.